The Taclet Match Dialog
When KeY needs your help to apply a rule — a quantifier instantiation, a cut, a
rule with an \assumes clause — it opens this dialog so you can supply the
missing pieces. It shows how the rule matched your sequent and what applying it
would do, all in one place.
How the rule matched, and what it does
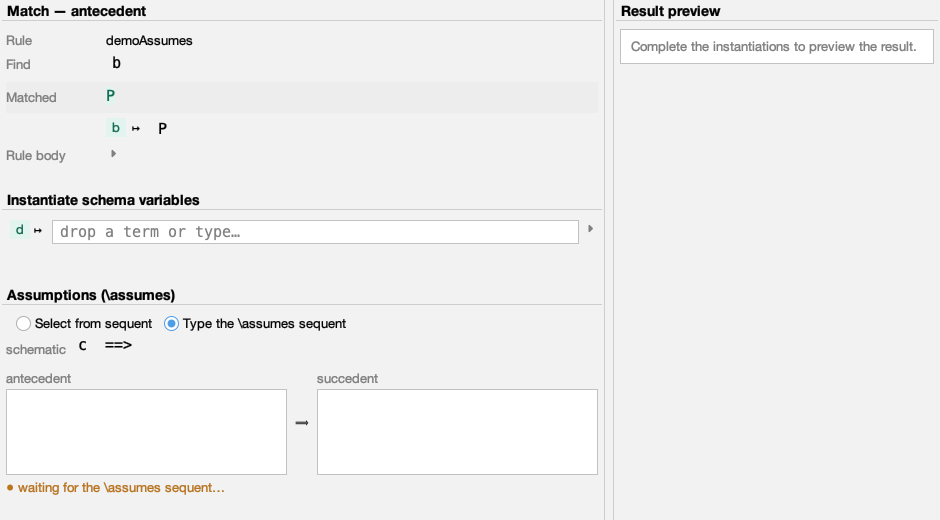
The top-left match overview answers the first question you usually have — how did this rule match here? — and the result preview on the right shows what applying it would produce.
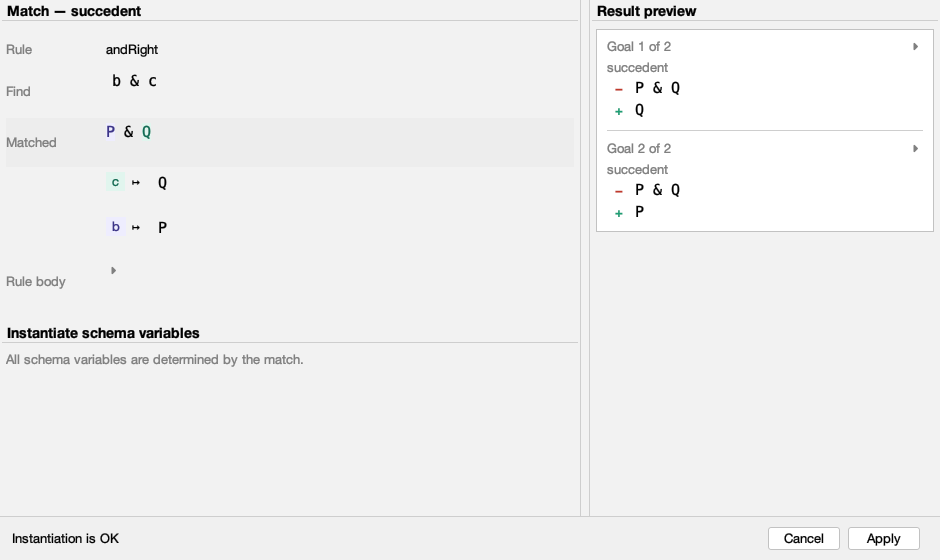
- Find is the rule's schematic pattern; Matched is the actual term it landed on, set off in a faint band so the concrete instance stands out. A matched term taller than two lines is collapsed to a single line with a toggle, so a big term does not dominate the panel.
- Each schema variable the match has already fixed appears as a coloured chip
next to the term it stands for (here
b ↦ P,c ↦ Q). The same colour tints the sub-term the variable matched, right inside Matched above, so you can read each binding straight off the term. - The full rule body is one click away under Rule body, and otherwise stays out of the way.
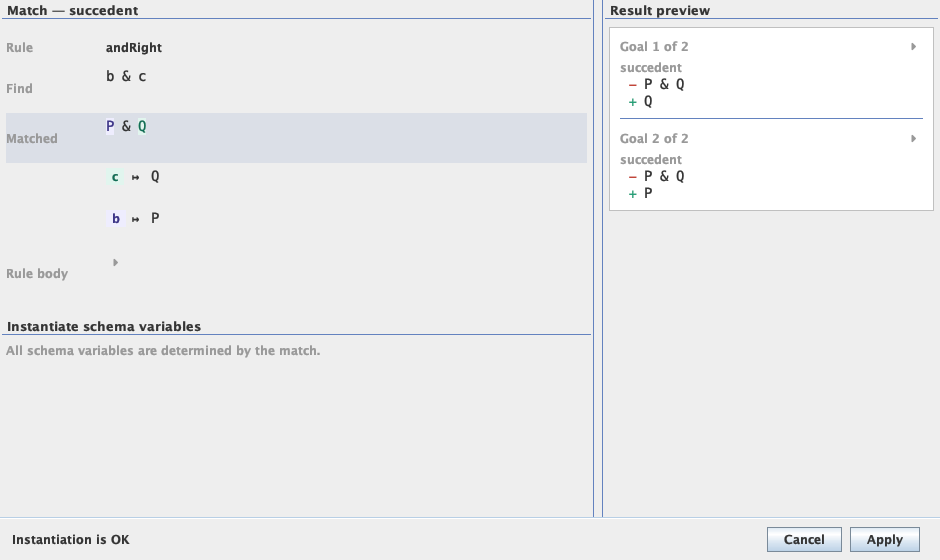
On the right, the result preview shows the sequent(s) the application would
produce — removed formulas in red (−), added ones in green (+), grouped per
resulting goal. It refreshes by itself a moment after you change something, and
it is only ever a preview: your proof stays untouched until you press Apply.
Colour-coded match
When the find pattern has several schema variables, each one's match is tinted in its own colour — both on its chip and inside the matched term — so even a busy match stays easy to read.
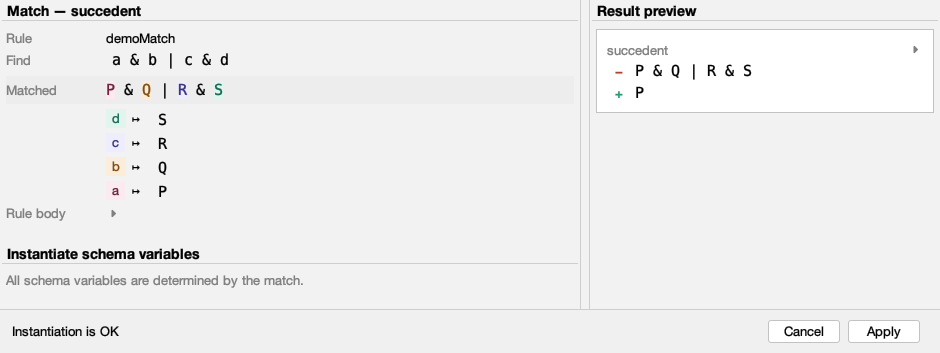
Here the pattern a & b | c & d matched P & Q | R & S: a ↦ P, b ↦ Q,
c ↦ R, d ↦ S — each variable, its chip and its sub-term share one colour. So
you can trace any variable from its binding straight to the spot it occupies in
the term, however nested the match.
Filling in schema variables
You only ever see the variables that still need your input. The ones the match already settled stay read-only in the overview above.
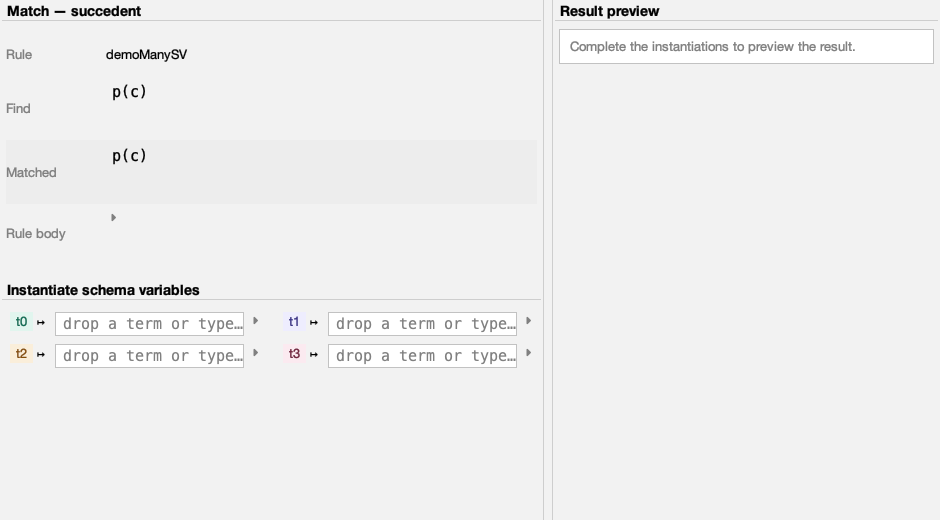
- Type a term, or drag one straight from the sequent and drop it on the field — it lands where your cursor is.
- A long or multi-line value expands on a small toggle instead of stretching the window. For a really big instantiation, the edit icon next to the toggle opens a larger, resizable editor window.
- With several variables the fields tidy themselves into two columns.
Supplying the assumptions
When a taclet has an \assumes clause, its instantiation gets its own section,
and you can choose how to fill it in.
For each assumption, choose a matching formula from a short candidate list. Selecting one commits it straight away, and the preview follows.
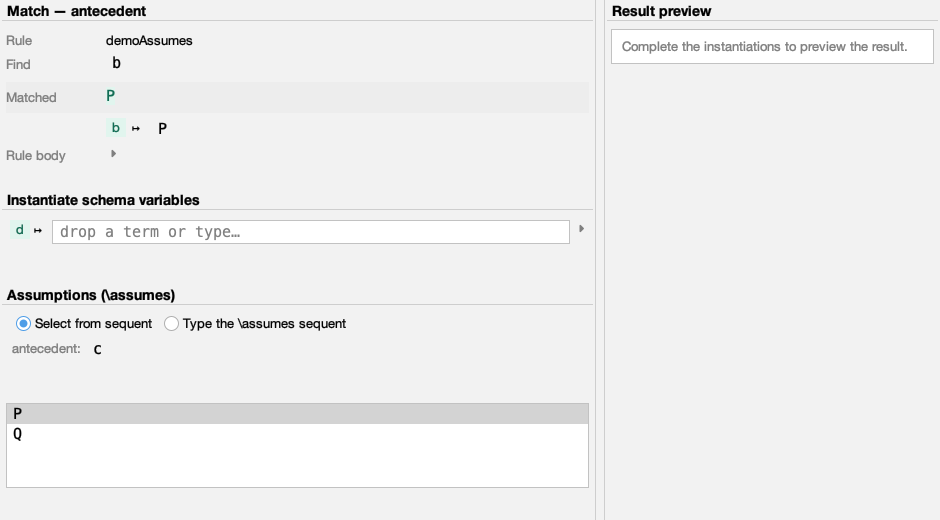
Prefer to write it out? Type the whole \assumes sequent, with a schematic
reminder of what is expected right above.
Mistakes caught early
Whatever you enter is checked as you go, so a problem shows up while you are still typing — not after you press Apply.
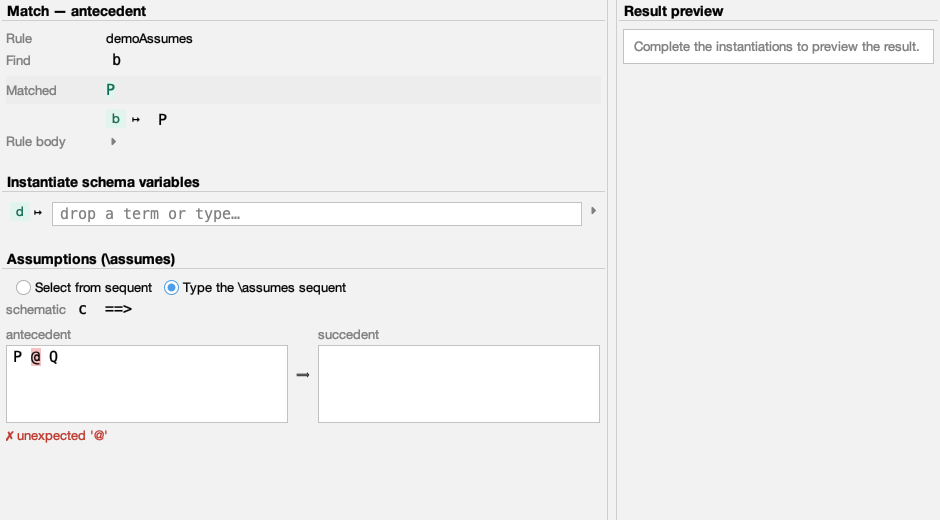
- A typed
\assumessequent is parsed as you type; a slip is reported in plain words and the offending spot is highlighted (here the stray@). Each field holds only one side of the sequent, so the messages stay about what you typed — a stray token reads as unexpected '@', an unfinished one as incomplete formula. - The status line tracks the whole instantiation — it reads Instantiation is OK only when everything fits, and otherwise tells you what is still missing or why the rule does not apply, before you commit.
Comfortable in any theme
Inputs sit beside the preview when there is room and fold into tabs when there is not; the dialog uses the active look-and-feel throughout, classic or flat.
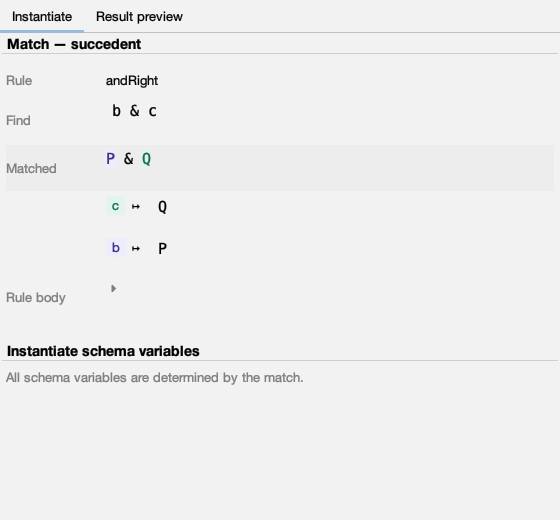
Drag the divider to balance the inputs against the preview. Below a threshold width the two sides fold into Instantiate and Result preview tabs. The window remembers its size and place for next time.
Prefer the previous dialog?
For a migration period the previous dialog is still available. Enable Use classic taclet instantiation dialog under Options → Settings → Appearance & Behaviour → Interaction; the redesigned dialog is the default.